"Because the TRF101 is so new and has an unknown differential in performance to the F104, its legality in the TCS series is on hold for the remaining 2013 regional events including the Finals and will be reviewed for 2014 season. We will have a better understanding of how the chassis performs in relation to the F104 line and can proceed appropriately."
David Jun of Tamiya USA
http://www.rctech.net/forum/12277937-post18060.html
Buyer beware!! It appears that you may want to hold off the TRF101 if you are planning on using it for Tamiya TCS events in the USA.
Friday, June 21, 2013


Thursday, June 20, 2013


Wednesday, June 19, 2013
Yeah Racing Transformula TransThingula
So I saw a Yeah Racing Transformula kit on ebay with no reserve. The car was kind of intriguing in that it was a bit of a precursor to all the link cars out there and one of the first aftermarket set ups since the resurgence of F1 racing. I also saw some things I liked about the kit that I though I could use. Anyway, I got the kit for about $85, which was good as the other ones I saw on ebay are going for about $160.
The car showed up and it was actually completely built.

The thing about the chassis is that it is F103 length. That is quite a bit shorter than an F104, and makes the car do strange stuff if you attempt to run it to the narrower F104 width (180-190mm). Unfortunately, this rules out using the link setup. However, the T bar setup, which the car comes built with, is able to be modified to a wheelbase closer to the F104. Moving the support posts for the upper deck and t bar connections to the extreme rear of the chassis plate will give a wheelbase about 4mm shorter than an F104, which is acceptable.

I used the upper deck as a template to re drill the holes in the chassis plate. Luckily, everything lined up almost perfectly without interfering with any holes already in the chassis. I also had to drill new holes to move the body mounts to the correct position for a modern body.

After setting up the rear end of the car to length, I wanted to put on the F104 front end with Exotek parts. I didn't really anticipate there being any problems with this, but the Yeah racing servo mounts are meant for an F103 front end. Normally this just means the mounts have to be replaced with F104 style servo mounts to work with the F104 front end parts. What's weird is that the Yeah racing parts are about 2mm shorter, requiring the chassis to be re drilled again to work with standard F104 parts. It's really weird since the F103 and F104 parts from Tamiya are totally interchangeable....

Once I was done drilling, here is the closer to finished product:

I did want to show the dual damper setup I was able to build. The motor pod parts support this for the link setup, but I was able to adapt it for the t bar configuration using the old body mount holes, and the plastic tubes from the F104V2 parts tree. I used the plastic damper tubes since I needed to cut them to fit, and I would not be making a mistake on the more expensive option roll damper tubes. Eventually I will replace the plastic tubes as the idea has proven itself on the track. The only reason I would replace the plastic tubes is that there will be more surface area on the option damper tubes once they are cut down.


Another small problem is the motor pod. It is like the F103 pod, set up for the smaller F103 tire. Ride height becomes excessive when F104 diameter tires are used. This was not a big deal as I was able to take a used F103 t bar and cut it down so only the pod area remained to make a spacer. This brought the ride height to about 4mm with the #2 axle cam.

To work with the modern bodies, a shorty pack fits perfectly. To secure the pack, I put two holes in the upper deck slightly wider than the pack to retain the battery. Tape is very hard to work with in this case, but the screws keep the pack from moving. The fit is pretty snug otherwise, so only the screws are really needed.

Those are the major changes needed to get the car running. I added a Tamiya axle and diff, along with a sedan shock. To mount the body using the separate side pods, a small slice needs to be made near the rear to clear the end of the upper deck where the tubes attach. If you use the body in one piece form, this probably is not necessary. I have not fitted it yet, but I think that the F104Pro body might be a nice choice in that the winglets on the side would hide the protruding parts.

As far as testing goes, once I finished the car, I turned it over to my buddy Kevin for testing. He brought it out to the carpet track on practice day. I wasn't able to drop by until later in the day, but he told me over the phone "You're not getting this car back unless you can find another one". It was pretty good out of the box. Initially it was set up with 2 o rings on the t bar and the tubes with 2000 wt diff oil. Kevin tried 30,000 wt oil in the tubes at the end of the day, but that was a bit much and the car wanted to traction roll from being too stiff.
The next week I took the car out and tried a few things as well. Kevin wanted to try the car with the F103 damper pucks just to see if it was any better. I ran it most of the day with the pucks and it was pretty good, but in the last couple runs I went back to the tubes, and for me anyway, the car seemed to drive better. I wound up with 7000 wt oil, and that was pretty good. I also changed the t bar setup to a .5mm spacer on the front screw and a stiff black Tamiya o ring on the back. We wanted to try to get the car a little flatter, and this worked well.
Overall, and with only a little time on the car, it is very good. You are limited on battery placement in the t bar configuration, but so far it has not been a big hindrance. On the plus side, the F103 style t bars are dirt cheap and offer a lot of options in setup (tilting the t bar, different types of o rings and spacers to control roll characteristics). I'm going to continue to work with the car as I think we have only scratched the surface.
The car showed up and it was actually completely built.
The thing about the chassis is that it is F103 length. That is quite a bit shorter than an F104, and makes the car do strange stuff if you attempt to run it to the narrower F104 width (180-190mm). Unfortunately, this rules out using the link setup. However, the T bar setup, which the car comes built with, is able to be modified to a wheelbase closer to the F104. Moving the support posts for the upper deck and t bar connections to the extreme rear of the chassis plate will give a wheelbase about 4mm shorter than an F104, which is acceptable.
I used the upper deck as a template to re drill the holes in the chassis plate. Luckily, everything lined up almost perfectly without interfering with any holes already in the chassis. I also had to drill new holes to move the body mounts to the correct position for a modern body.
After setting up the rear end of the car to length, I wanted to put on the F104 front end with Exotek parts. I didn't really anticipate there being any problems with this, but the Yeah racing servo mounts are meant for an F103 front end. Normally this just means the mounts have to be replaced with F104 style servo mounts to work with the F104 front end parts. What's weird is that the Yeah racing parts are about 2mm shorter, requiring the chassis to be re drilled again to work with standard F104 parts. It's really weird since the F103 and F104 parts from Tamiya are totally interchangeable....
Once I was done drilling, here is the closer to finished product:
I did want to show the dual damper setup I was able to build. The motor pod parts support this for the link setup, but I was able to adapt it for the t bar configuration using the old body mount holes, and the plastic tubes from the F104V2 parts tree. I used the plastic damper tubes since I needed to cut them to fit, and I would not be making a mistake on the more expensive option roll damper tubes. Eventually I will replace the plastic tubes as the idea has proven itself on the track. The only reason I would replace the plastic tubes is that there will be more surface area on the option damper tubes once they are cut down.
Another small problem is the motor pod. It is like the F103 pod, set up for the smaller F103 tire. Ride height becomes excessive when F104 diameter tires are used. This was not a big deal as I was able to take a used F103 t bar and cut it down so only the pod area remained to make a spacer. This brought the ride height to about 4mm with the #2 axle cam.
To work with the modern bodies, a shorty pack fits perfectly. To secure the pack, I put two holes in the upper deck slightly wider than the pack to retain the battery. Tape is very hard to work with in this case, but the screws keep the pack from moving. The fit is pretty snug otherwise, so only the screws are really needed.
Those are the major changes needed to get the car running. I added a Tamiya axle and diff, along with a sedan shock. To mount the body using the separate side pods, a small slice needs to be made near the rear to clear the end of the upper deck where the tubes attach. If you use the body in one piece form, this probably is not necessary. I have not fitted it yet, but I think that the F104Pro body might be a nice choice in that the winglets on the side would hide the protruding parts.
As far as testing goes, once I finished the car, I turned it over to my buddy Kevin for testing. He brought it out to the carpet track on practice day. I wasn't able to drop by until later in the day, but he told me over the phone "You're not getting this car back unless you can find another one". It was pretty good out of the box. Initially it was set up with 2 o rings on the t bar and the tubes with 2000 wt diff oil. Kevin tried 30,000 wt oil in the tubes at the end of the day, but that was a bit much and the car wanted to traction roll from being too stiff.
The next week I took the car out and tried a few things as well. Kevin wanted to try the car with the F103 damper pucks just to see if it was any better. I ran it most of the day with the pucks and it was pretty good, but in the last couple runs I went back to the tubes, and for me anyway, the car seemed to drive better. I wound up with 7000 wt oil, and that was pretty good. I also changed the t bar setup to a .5mm spacer on the front screw and a stiff black Tamiya o ring on the back. We wanted to try to get the car a little flatter, and this worked well.
Overall, and with only a little time on the car, it is very good. You are limited on battery placement in the t bar configuration, but so far it has not been a big hindrance. On the plus side, the F103 style t bars are dirt cheap and offer a lot of options in setup (tilting the t bar, different types of o rings and spacers to control roll characteristics). I'm going to continue to work with the car as I think we have only scratched the surface.
Friday, June 7, 2013
UF1 MIDWEST First Season Thoughts
I suppose it's taken long enough to get to this. I really haven't posted too much here, and there is really no reason for that. Anyway, I just wanted to post on some of my thoughts about the first UF1 series in the Midwest.
There were 4 races, 2 at Harbor Hobbies, and at Hobby Stop West in Toledo OH and Hot Slots of Champaign IL. That's a lot more driving and geography than the guys in Southern California have to deal with, but F1 is still getting off the ground here. To help with the attendance, there were 2 separate days of racing each weekend, with 3 drops so 8 total race days. This way even if you could only attend one day, you could still race and score good points. UF1 MIDWEST Facebook page
Rules were basically the same as the original UF1 series, but the Pardus tire was used as a spec tire as opposed to the open tire rules of the original UF1. It's a bit of a change from the Pit Shimizu tire that is more popular, a little taller sidewall and only available in one compound. We found that to get the best result, the front tire had to be glued up on both inside and outside sidewalls. Otherwise, the cars got tippy in a high traction environment. The tires were nice in that the tire, insert, and wheels were under $30 for the set.
As far as the tracks, there were very different in terms of the traction characteristics. Harbor has quite a bit of traction, but can have a bit of a slippery feeling when there are a lot of cars on the track. Hobby Stop had outrageous traction, the cars were bolted down, and in fact a lot of the cars were chattering in the turns. Hot Slots was more medium traction, and despite building a black groove, didn't get to overwhelming traction. Hot Slots was also the smallest track, our "Monaco".
I ran the TOP racing F1 car to start the series. When I initially put the car together, I realized the TOP car had a lot of steering, more than the Tamiya F104V2 car I had been running. The car comes with a pan car style front end, so I replaced it with the F104 front end with the Exotek upper link system for adjustable camber and caster. Otherwise, I pretty much ran the car stock from the box. I also used the Speed Passion body with the wings from the Tamiya F60 Ferrari.
Typically, I had been running a short battery moved to the back of the car, and most of the time, the side springs backed off of the chassis. What is significant about this is that as the races went along, I began to develop a setup theory based on the battery placement. A lot of what I was doing, such as backing the springs off the chassis, was to allow the chassis to roll farther to keep the car from traction rolling. The problem with this is that the short battery needed to be moved forward as the traction came up. The key is that the more weight that is over the pivot point where the chassis meets the rear pod, the more the car will want to traction roll. This is somewhat counter intuitive, but most of the suspension action occurs at the rear of the car. Moving the battery forward also will make the steering feel less sensitive. The battery back tends to make the car rotate middle corner and be a little more sensitive on center.
So if the battery is forward, you can also run the springs touching the chassis or even with some preload. The problem with running the springs off the chassis is that the car is not as stable feeling. It does tend to rotate a little more, but feels like it has less corner speed. I think part of the reason I liked the battery back was that the car seemed to have more forward traction when the bite was lower. I race at Harbor Hobby all the time, and I think that it's characteristic is that you are looking more for forward bite than side bite until traction gets high.
Leading up to the first race, I had only run the car to it's stock width, around 180mm. The rules allow up to 190mm, but my car was actually pretty good, and I didn't change anything. The thing about the TOP car is that the axle is 1/4" vs. the metric axle on Tamiya and most other cars. This means that you can't use something like the RSector widening kit. IF you want to stretch the rear end, you have to space it.
So when the weekend of the first race came, one of the guys from Toledo, Lon, showed up with a F104V2 with a widening kit on it. He was .2 a lap faster than what I could do. So I figured out that I would need to get the car closer to 190mm. The front end was fine as I could use the RSector axles and knuckles, but the rear end had to be spaced with shims, a lot of them. Luckily, I got close to 190 this way, but the clamping hub on the left side turned out not to be quite as tight as it could be. On the first day, it cost me my qualifying run when it came off the car. Of course, there was no problem at all during practice, but once it counted problems ensued... :/ I opened the slot in the clamp hub to try to let it have more movement to grab the axle, but it came apart again on Sunday. I finally had to drill and tap a hole for a set screw which solved the problem. The problems with the axle were somewhat unfortunate because the car was really good that weekend. Lon Burling from Toledo was TQ for both days. His car was very good, the best I think I had seen an F1 car up to that point. My car was really good too, and I think a little better over longer runs like the 15 minute final. Lon definitely had the advantage on the short qualifying run.
The first day I was in the lowest main due to blowing out in qualifying. I scored pretty good points but it was hard to see how my car was compared to the A main guys. The second day I was able to qualify second to Lon. The interesting thing was that in the mains I could see that my car ran better over the 15 minutes. Lon's car was not as good on this track over the long runs, but I later found out why.
When the second round started at the Hobby Stop West in Toledo, I realized that Lon's car was set up for the ultra high bite at the Toledo track. The bite there was almost sticky. Quite a few cars were traction rolling, and also hopping due to the bite. In this environment, Lon's car was unstoppable. Both days I was able to qualify second, but over the longer runs my car just could not compete. OF course, nobody else really could either. My car was decently fast, but picked up tires in a lot of corners, which was costing me time. The other problem as that I really didn't seem to be able to get my diff right. A big problem with rubber tires is that they put a lot of stress on the diff, and as the bite goes up, this increases. It's hard to keep the diff action smooth and not have the diff slip on every corner. This is compounded with the Pardus tire compared to the Pit as it is a heavier tire. Anyway, I had actually broken the thread on my axle while tightening it, but I was able to unthread enough material from the graphite of the axle to make it work again. It held, but it was a little scary.
I did get to see the VBC F1 car at the Toledo round on Sunday. Dave Johnson, a CRC driver raced it on Sunday, and while it was his first day with it, he was able to stay right at the front with the car. You could see that the car could be even faster with some more time on it.
For the third round at Hot Slots, I came to an impasse with the TOP car. This track was the most different from the others. As it turned out, the track was so tight, the 180mm setup was the way to go to get the car to turn. I had made a visit to the track before the race, and the 190mm setup just made the cars too slow in the corner. Part of this was the tightness, and I think part of this was also the fact that the track didn't build a huge amount of traction. Traction was good, but not like you would expect after seeing the black groove on the track.
My problem was that the TOP car did not want to turn. It felt "long", which I have felt before with an Exotek F104 with a short top deck. In retrospect, this seems like it is a function of too much chassis flex, but fore and aft flex vs. twist. The Exotek car has a 2.25 lower chassis and an upper deck that stretches the full length of the car, but I made a custom short upper deck. With this short deck, I noticed that the car would feel "long" compared to my other cars. I got this same feeling from my TOP car at this track. The TOP car has a 2.5mm lower deck. The Tamiya cars all have a 3mm chassis, which at times seems like bit much, but look at a V2. There is not really an upper deck to speak of, so this works. As far as why I think the front to back flex is the most important, on the older F104 models and even an F103, the full length upper decks make the cars steer more. Often, I would use o rings to promote twist flex in the cars and let the car move side to side. Changing to a short upper deck will dull the steering of the car. Considering that the TOP car is really designed for foam tire racing on a 200mm setup, it makes sense the designers would want more flex to keep the car from being completely bananas. This also tends to work in your favor when the bite is really high, since again, you need to dull the steering. Of course, this is all retrospect as I tried about everything I could setup wise at the track, but the car was just not on pace.
I did have my F104V2 with me so I asked Eric "Snowy" from Wisconsin what he was doing with his car. He was right at the front, and his car looked great. He was nice enough to help me get the V2 setup for the mains and share his setup. The amazing thing was that with Eric's help, I was able to be instantly on the race pace as soon as I put the car on the track. It was just the car. Every car in the A main was either a Tamiya or an Exotek Tamiya. In fact, I have to mention Ted Hammer's car. Ted is a gas car guy from Toledo, and he was racing an F104X1. His car was FANTASTIC. Honestly, my mind was blown at how good his car was. He had the fastest car at the track hands down. At the same time, Rick Vessel's Exotek car wound up being the class of the field in the mains. He was able to keep his car out front when everybody else got into the "action" further back.
In the final round at Harbor Hobby once again, I stuck with the F104V2. It was working ok, and I wasn't able to find a new axle for the TOP car, so I decided stick with the safe option so I could make it through the weekend. Rick Vessel again was fast. I never really got my car the way I wanted for more than one run. I'm not sure if it was a tire or tire prep issue or the way the track changed. I was able to be close to the pace, but it seemed like at times my car faded as the races went on. The TOP car was definitely more consistent than this, but I would have been afraid to run it with the axle issues I had. In the end I did ok, but I wish I had been able to get a little more from the car.
Despite all the trials and tribulations, I was able to finish second in the series, mostly based on having some consistent finishes. Rick Vessel came on strong in the last two weekends, and was able to take the overall championship with his Exotek F1R F104.
This was probably one of the most fun things I have done in rc racing. It was extremely challenging, and I can only imagining it getting harder the next time around.
There were 4 races, 2 at Harbor Hobbies, and at Hobby Stop West in Toledo OH and Hot Slots of Champaign IL. That's a lot more driving and geography than the guys in Southern California have to deal with, but F1 is still getting off the ground here. To help with the attendance, there were 2 separate days of racing each weekend, with 3 drops so 8 total race days. This way even if you could only attend one day, you could still race and score good points. UF1 MIDWEST Facebook page
Rules were basically the same as the original UF1 series, but the Pardus tire was used as a spec tire as opposed to the open tire rules of the original UF1. It's a bit of a change from the Pit Shimizu tire that is more popular, a little taller sidewall and only available in one compound. We found that to get the best result, the front tire had to be glued up on both inside and outside sidewalls. Otherwise, the cars got tippy in a high traction environment. The tires were nice in that the tire, insert, and wheels were under $30 for the set.
As far as the tracks, there were very different in terms of the traction characteristics. Harbor has quite a bit of traction, but can have a bit of a slippery feeling when there are a lot of cars on the track. Hobby Stop had outrageous traction, the cars were bolted down, and in fact a lot of the cars were chattering in the turns. Hot Slots was more medium traction, and despite building a black groove, didn't get to overwhelming traction. Hot Slots was also the smallest track, our "Monaco".
I ran the TOP racing F1 car to start the series. When I initially put the car together, I realized the TOP car had a lot of steering, more than the Tamiya F104V2 car I had been running. The car comes with a pan car style front end, so I replaced it with the F104 front end with the Exotek upper link system for adjustable camber and caster. Otherwise, I pretty much ran the car stock from the box. I also used the Speed Passion body with the wings from the Tamiya F60 Ferrari.
Typically, I had been running a short battery moved to the back of the car, and most of the time, the side springs backed off of the chassis. What is significant about this is that as the races went along, I began to develop a setup theory based on the battery placement. A lot of what I was doing, such as backing the springs off the chassis, was to allow the chassis to roll farther to keep the car from traction rolling. The problem with this is that the short battery needed to be moved forward as the traction came up. The key is that the more weight that is over the pivot point where the chassis meets the rear pod, the more the car will want to traction roll. This is somewhat counter intuitive, but most of the suspension action occurs at the rear of the car. Moving the battery forward also will make the steering feel less sensitive. The battery back tends to make the car rotate middle corner and be a little more sensitive on center.
So if the battery is forward, you can also run the springs touching the chassis or even with some preload. The problem with running the springs off the chassis is that the car is not as stable feeling. It does tend to rotate a little more, but feels like it has less corner speed. I think part of the reason I liked the battery back was that the car seemed to have more forward traction when the bite was lower. I race at Harbor Hobby all the time, and I think that it's characteristic is that you are looking more for forward bite than side bite until traction gets high.
Leading up to the first race, I had only run the car to it's stock width, around 180mm. The rules allow up to 190mm, but my car was actually pretty good, and I didn't change anything. The thing about the TOP car is that the axle is 1/4" vs. the metric axle on Tamiya and most other cars. This means that you can't use something like the RSector widening kit. IF you want to stretch the rear end, you have to space it.
So when the weekend of the first race came, one of the guys from Toledo, Lon, showed up with a F104V2 with a widening kit on it. He was .2 a lap faster than what I could do. So I figured out that I would need to get the car closer to 190mm. The front end was fine as I could use the RSector axles and knuckles, but the rear end had to be spaced with shims, a lot of them. Luckily, I got close to 190 this way, but the clamping hub on the left side turned out not to be quite as tight as it could be. On the first day, it cost me my qualifying run when it came off the car. Of course, there was no problem at all during practice, but once it counted problems ensued... :/ I opened the slot in the clamp hub to try to let it have more movement to grab the axle, but it came apart again on Sunday. I finally had to drill and tap a hole for a set screw which solved the problem. The problems with the axle were somewhat unfortunate because the car was really good that weekend. Lon Burling from Toledo was TQ for both days. His car was very good, the best I think I had seen an F1 car up to that point. My car was really good too, and I think a little better over longer runs like the 15 minute final. Lon definitely had the advantage on the short qualifying run.
The first day I was in the lowest main due to blowing out in qualifying. I scored pretty good points but it was hard to see how my car was compared to the A main guys. The second day I was able to qualify second to Lon. The interesting thing was that in the mains I could see that my car ran better over the 15 minutes. Lon's car was not as good on this track over the long runs, but I later found out why.
When the second round started at the Hobby Stop West in Toledo, I realized that Lon's car was set up for the ultra high bite at the Toledo track. The bite there was almost sticky. Quite a few cars were traction rolling, and also hopping due to the bite. In this environment, Lon's car was unstoppable. Both days I was able to qualify second, but over the longer runs my car just could not compete. OF course, nobody else really could either. My car was decently fast, but picked up tires in a lot of corners, which was costing me time. The other problem as that I really didn't seem to be able to get my diff right. A big problem with rubber tires is that they put a lot of stress on the diff, and as the bite goes up, this increases. It's hard to keep the diff action smooth and not have the diff slip on every corner. This is compounded with the Pardus tire compared to the Pit as it is a heavier tire. Anyway, I had actually broken the thread on my axle while tightening it, but I was able to unthread enough material from the graphite of the axle to make it work again. It held, but it was a little scary.
I did get to see the VBC F1 car at the Toledo round on Sunday. Dave Johnson, a CRC driver raced it on Sunday, and while it was his first day with it, he was able to stay right at the front with the car. You could see that the car could be even faster with some more time on it.
For the third round at Hot Slots, I came to an impasse with the TOP car. This track was the most different from the others. As it turned out, the track was so tight, the 180mm setup was the way to go to get the car to turn. I had made a visit to the track before the race, and the 190mm setup just made the cars too slow in the corner. Part of this was the tightness, and I think part of this was also the fact that the track didn't build a huge amount of traction. Traction was good, but not like you would expect after seeing the black groove on the track.
My problem was that the TOP car did not want to turn. It felt "long", which I have felt before with an Exotek F104 with a short top deck. In retrospect, this seems like it is a function of too much chassis flex, but fore and aft flex vs. twist. The Exotek car has a 2.25 lower chassis and an upper deck that stretches the full length of the car, but I made a custom short upper deck. With this short deck, I noticed that the car would feel "long" compared to my other cars. I got this same feeling from my TOP car at this track. The TOP car has a 2.5mm lower deck. The Tamiya cars all have a 3mm chassis, which at times seems like bit much, but look at a V2. There is not really an upper deck to speak of, so this works. As far as why I think the front to back flex is the most important, on the older F104 models and even an F103, the full length upper decks make the cars steer more. Often, I would use o rings to promote twist flex in the cars and let the car move side to side. Changing to a short upper deck will dull the steering of the car. Considering that the TOP car is really designed for foam tire racing on a 200mm setup, it makes sense the designers would want more flex to keep the car from being completely bananas. This also tends to work in your favor when the bite is really high, since again, you need to dull the steering. Of course, this is all retrospect as I tried about everything I could setup wise at the track, but the car was just not on pace.
I did have my F104V2 with me so I asked Eric "Snowy" from Wisconsin what he was doing with his car. He was right at the front, and his car looked great. He was nice enough to help me get the V2 setup for the mains and share his setup. The amazing thing was that with Eric's help, I was able to be instantly on the race pace as soon as I put the car on the track. It was just the car. Every car in the A main was either a Tamiya or an Exotek Tamiya. In fact, I have to mention Ted Hammer's car. Ted is a gas car guy from Toledo, and he was racing an F104X1. His car was FANTASTIC. Honestly, my mind was blown at how good his car was. He had the fastest car at the track hands down. At the same time, Rick Vessel's Exotek car wound up being the class of the field in the mains. He was able to keep his car out front when everybody else got into the "action" further back.
In the final round at Harbor Hobby once again, I stuck with the F104V2. It was working ok, and I wasn't able to find a new axle for the TOP car, so I decided stick with the safe option so I could make it through the weekend. Rick Vessel again was fast. I never really got my car the way I wanted for more than one run. I'm not sure if it was a tire or tire prep issue or the way the track changed. I was able to be close to the pace, but it seemed like at times my car faded as the races went on. The TOP car was definitely more consistent than this, but I would have been afraid to run it with the axle issues I had. In the end I did ok, but I wish I had been able to get a little more from the car.
Despite all the trials and tribulations, I was able to finish second in the series, mostly based on having some consistent finishes. Rick Vessel came on strong in the last two weekends, and was able to take the overall championship with his Exotek F1R F104.
This was probably one of the most fun things I have done in rc racing. It was extremely challenging, and I can only imagining it getting harder the next time around.
Wednesday, May 15, 2013
First Ever Vintage F1 Video
Video of the first Vintage F1 race at the Tamiya USA track....by Charles Lightfoot...Incredible Work!!!
Monday, May 13, 2013
RCFIA Returns
http://www.rcfia.com/schedule/
"For it’s second season, the RCFIA Formula 1 series travels to 6 tracks across Northern California. With the addition of 2 new races and tracks, the RCFIA Formula 1 series will be even more interesting to watch and participate in!
"For it’s second season, the RCFIA Formula 1 series travels to 6 tracks across Northern California. With the addition of 2 new races and tracks, the RCFIA Formula 1 series will be even more interesting to watch and participate in!
The 2013 RCFIA Gran Primo D’Sonoma June 2nd 2013
The 2013 RCFIA Grand Prix of Ripon June 29th 2013
The 2013 RCFIA Grand Prix of Union City July 7th 2013
The 2013 RCFIA Grand Prix of Roseville July 27th 2013
The 2013 RCFIA Grand Prix of Antioch August 10th 2013
The 2013 RCFIA Grand Prix of Ukiah August 24th 2013
The 2013 RCFIA Grand Prix of Ripon June 29th 2013
The 2013 RCFIA Grand Prix of Union City July 7th 2013
The 2013 RCFIA Grand Prix of Roseville July 27th 2013
The 2013 RCFIA Grand Prix of Antioch August 10th 2013
The 2013 RCFIA Grand Prix of Ukiah August 24th 2013
Friday, January 25, 2013
V2 build V.2

To continue on with the build up of the V2, there are some options to consider. One is the use of the damper tube instead of the roll shock or side shock.

Tamiya sells the 54413 aluminum roll damper, but the delrin version that is included with the X1 kit is virtually the same. Both are used with many types of grease, from pan car greases to 1/8 diff oils. I prefer the diff oils since I know what the rating is and they are available everywhere. There really is nothing wrong with the side shock but it's more work to set up and is a little more maintenance.
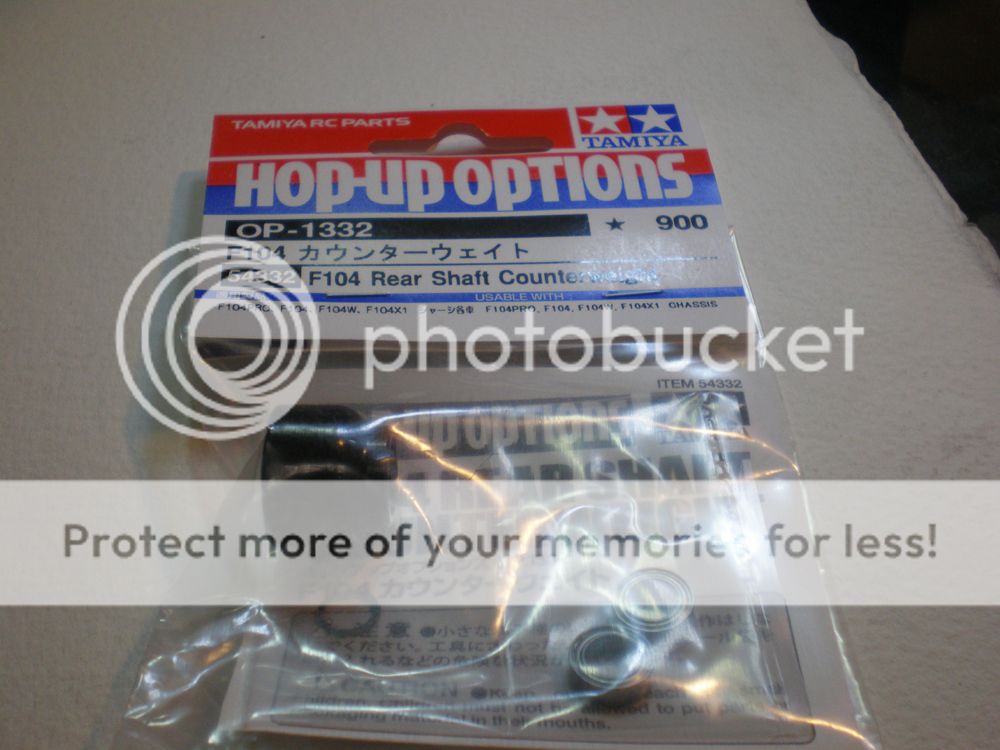
The 54332 Counterweight is also something to consider. This is another X1 part. With the older Tamiya tires, I did not notice a big difference with or without the counterweight, and much the same for foam tires. However, with the new "TCS" tires, the counterweight seems to be a big help. I find the car drives a lot better, and feels more balanced. I think part of this is the better grip afforded by the TCS rubber. With foam the cars are locked down and lighter is better, but the rubber tires need a little more balance when they have some grip.


The 54375 carbon brace...Do you need it? I'm not really convinced you do if you also have the aluminum pod. The pod comes with an aluminum cross brace anyway, so the carbon fiber is overkill. It might be good if you ran the plastic pod for some reason. IF you don't want to use the aluminum cross brace, then it is necessary, but the plastic from the kit is fine with the aluminum pod...
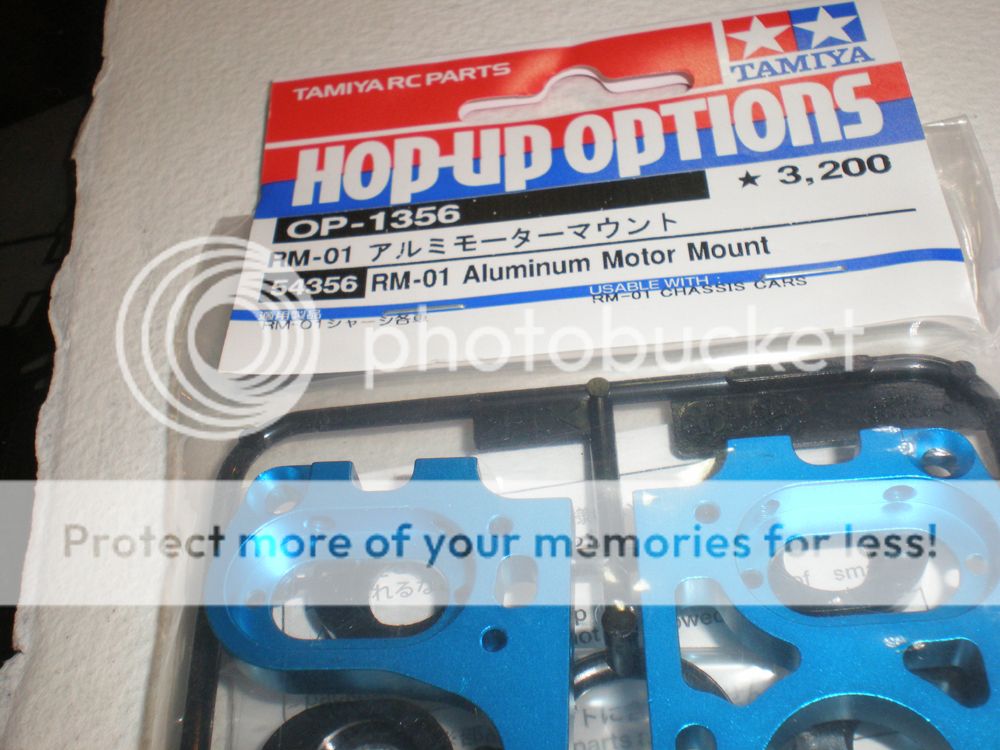
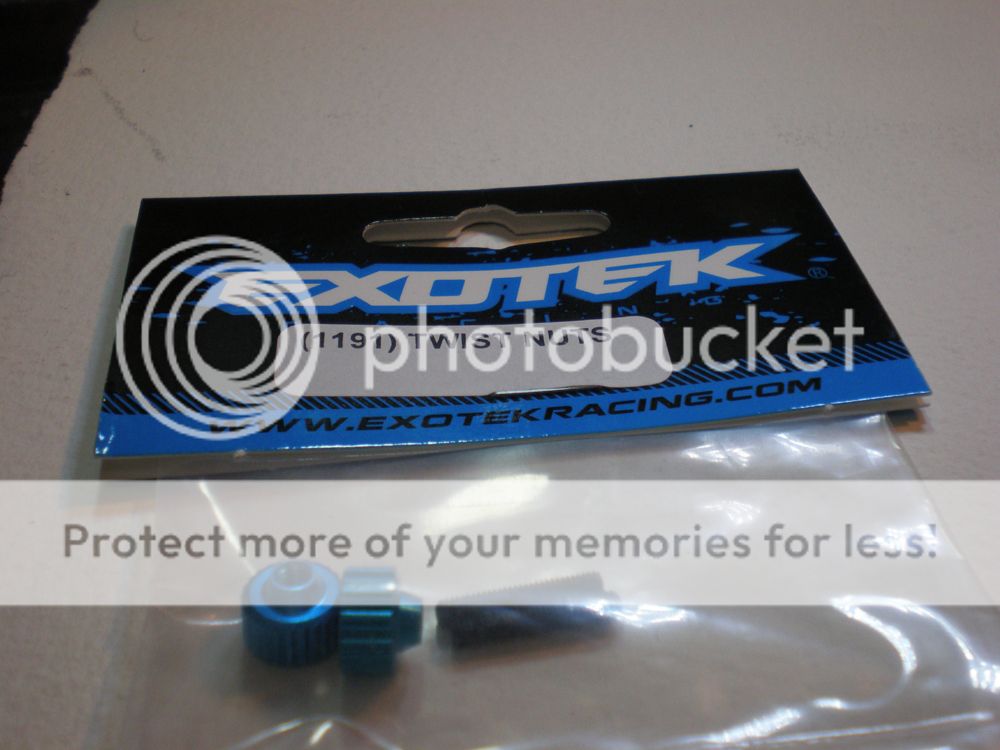

The odd ball part here is this doubles sided carpet tape. A nice rectangular patch on your chassis will keep the battery from moving at all. It retains it's stick for a long time, so much so that I find it's best to stick your hand to it a few times to kill some of the adhesive before you first put the battery in. This is great for sedans as well..
That's it for the extra stuff I used on the car, but I'll have some more tips on putting everything together in a bit. Enjoy Tamiya USA's Fred Medel as he explains the F104V2 setting sheet and what the adjustments do....
Tuesday, January 22, 2013
VBC Flash F1 prototype

http://www.area52.cc/news/3263-vbc-f1-flash04-teaser.html
VBC to introduce a new F1 car...very cool front end setup, especially the steering which should help a lot of the bump steer woes faced by direct linkage cars.
Via Area 52
V2 build V.2 front end
I built a second V2 car so that I could have something fresh, as I have a ton of time on the first car I bought since receiving it. Along they way I have picked up quite a few things that I thought I'd share as small tips that help make a nicer build on the car. So lets start with some front end items.
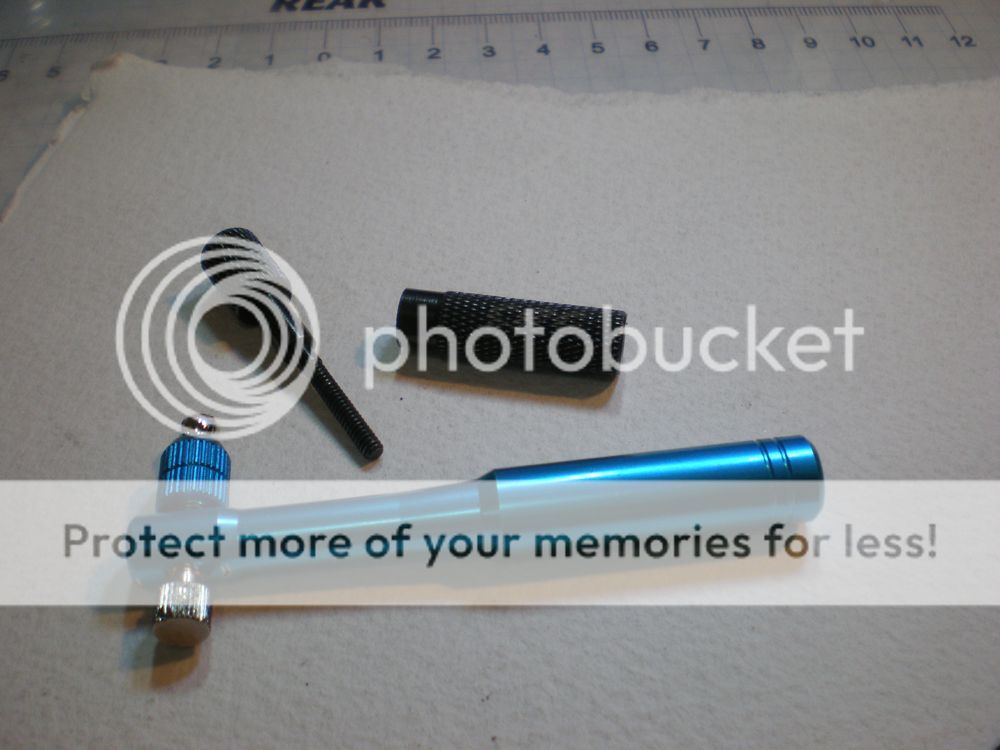
On the bottom is a Much More ball cup reamer that I use for the upper suspension arms. This is better than squeezing the arm with a pliers to free up the suspension.


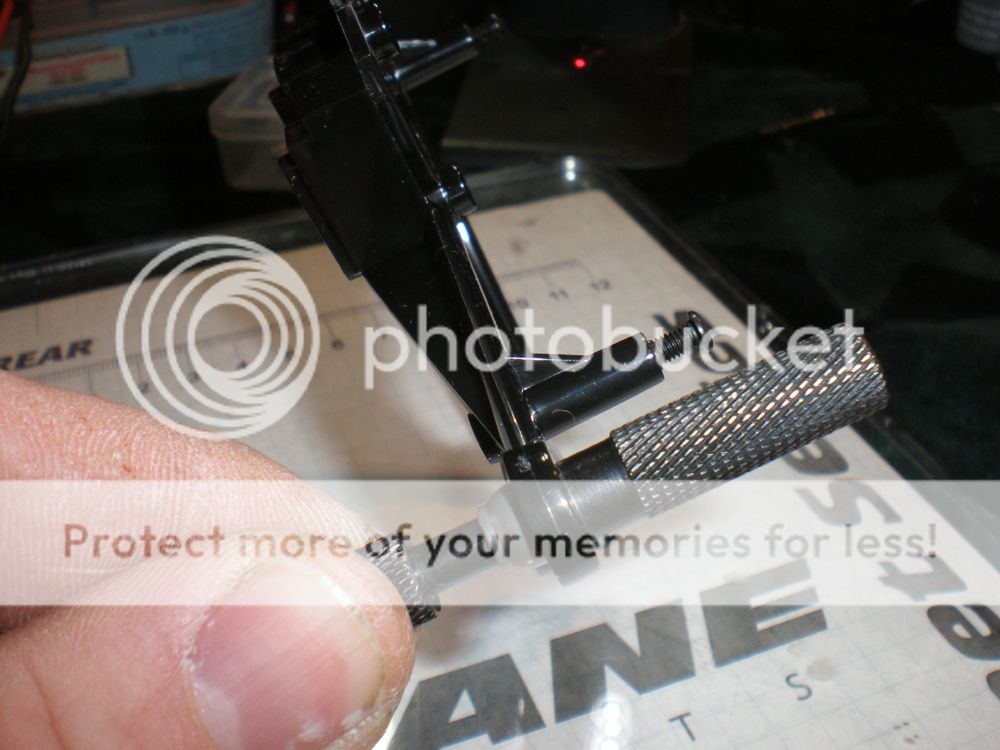

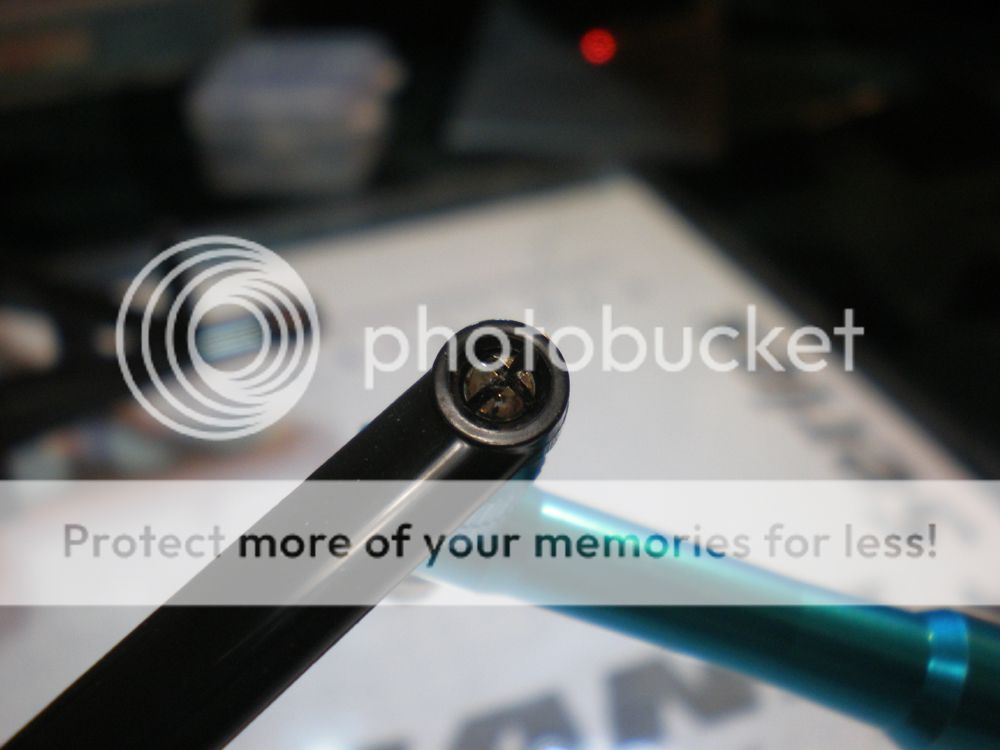


It also can be helpful to partially thread the arm from the bottom with a 3mm tap.


An example of how the partially and fully assembled part looks.
That's it for now, we'll get into the rest a bit later.
Friday, December 14, 2012
A great point on racing at big events
Rod Canare (rtypec on rctech) has been doing a bunch of posts on his trip to Japan as North American Tamiya Series champ. It's a great group of posts, and while he was there for sedan racing, he makes a great point:
"When my number was called I took off from the and as soon as I hit the first corner, followed by the chicane and left hand sweeper leading into the infield, I knew I was in trouble. Over steer everywhere! The track definately had grip and I felt that the tires worked fine, but the body just affected handling so much that whatever mechanical traction the chassis had became a moot point. As I struggled with the car for the first half of the qualifier, the theme song from the Benny Hill show started to play in my head. Additionally, thoughts of how frustrated my performance so far has been, and how embarrasing this must be for not only myself, but for those who wished me the best of luck, started to cross my mind. Fortunately, or unfortunately, driving the car required my undivided attention and I was able stop thinking about it and just hustle it. A big part of racing is your frame of mind. Once the car is on the track, you've got what you've got and nothing will change that fact your stuck out there until your run is completed. You can't stop to fix what's wrong and you can't over analyze things. Just do the best you can and get the most out of what the car will give you. My car was bad, my driving not much better, and I wrung it out for all that it's worth. Afterwards, I was asked if my back was sore because I carried that car lol. Unfortunately, lap times suffered tremendously. Despite going faster with a time of 14.566, the top qualifier pulled off a 14.170."
Full post
Thread
Very good insight on the mental end of racing, and also how to strategize when you are limited on time...
"For the second qualifier, I made no changes to the car but opted to use the Audi R8 instead of the Ferrari that it would provide a little more steering. My justification for this decision was that if it worked, great. If it didn't, atleast I'll be going slow in style. In hindsight, this may have screwed me over since quality track time was paramount and every opportunity to get a good run in mattered. There was no room to take one step forward and two steps back, which happened to be the case with my setups and choice of bodies."
"I used the final practice session as an installation run with the freshly rebuilt car and a new setup. I focused on getting a feel for the car and work on getting more of a feel for the track, all in three minutes. With the new parts and settings, my car did something that it hasn't done all weekend so far, it was squeeling tires! I've got traction and the car was predicatable. I wished our practice sessions were longer, I really needed the track time to figure out how to drive. After three minutes, I was a bit off pace. That was understandable since I wasn't really driving that hard because I just wanted to get a feel for things and save the car, without having to do a post-wreck trash'n dash repair job on a "freshy"."
"When my number was called I took off from the and as soon as I hit the first corner, followed by the chicane and left hand sweeper leading into the infield, I knew I was in trouble. Over steer everywhere! The track definately had grip and I felt that the tires worked fine, but the body just affected handling so much that whatever mechanical traction the chassis had became a moot point. As I struggled with the car for the first half of the qualifier, the theme song from the Benny Hill show started to play in my head. Additionally, thoughts of how frustrated my performance so far has been, and how embarrasing this must be for not only myself, but for those who wished me the best of luck, started to cross my mind. Fortunately, or unfortunately, driving the car required my undivided attention and I was able stop thinking about it and just hustle it. A big part of racing is your frame of mind. Once the car is on the track, you've got what you've got and nothing will change that fact your stuck out there until your run is completed. You can't stop to fix what's wrong and you can't over analyze things. Just do the best you can and get the most out of what the car will give you. My car was bad, my driving not much better, and I wrung it out for all that it's worth. Afterwards, I was asked if my back was sore because I carried that car lol. Unfortunately, lap times suffered tremendously. Despite going faster with a time of 14.566, the top qualifier pulled off a 14.170."
Full post
Thread
Very good insight on the mental end of racing, and also how to strategize when you are limited on time...
"For the second qualifier, I made no changes to the car but opted to use the Audi R8 instead of the Ferrari that it would provide a little more steering. My justification for this decision was that if it worked, great. If it didn't, atleast I'll be going slow in style. In hindsight, this may have screwed me over since quality track time was paramount and every opportunity to get a good run in mattered. There was no room to take one step forward and two steps back, which happened to be the case with my setups and choice of bodies."
"I used the final practice session as an installation run with the freshly rebuilt car and a new setup. I focused on getting a feel for the car and work on getting more of a feel for the track, all in three minutes. With the new parts and settings, my car did something that it hasn't done all weekend so far, it was squeeling tires! I've got traction and the car was predicatable. I wished our practice sessions were longer, I really needed the track time to figure out how to drive. After three minutes, I was a bit off pace. That was understandable since I wasn't really driving that hard because I just wanted to get a feel for things and save the car, without having to do a post-wreck trash'n dash repair job on a "freshy"."
Subscribe to:
Posts (Atom)