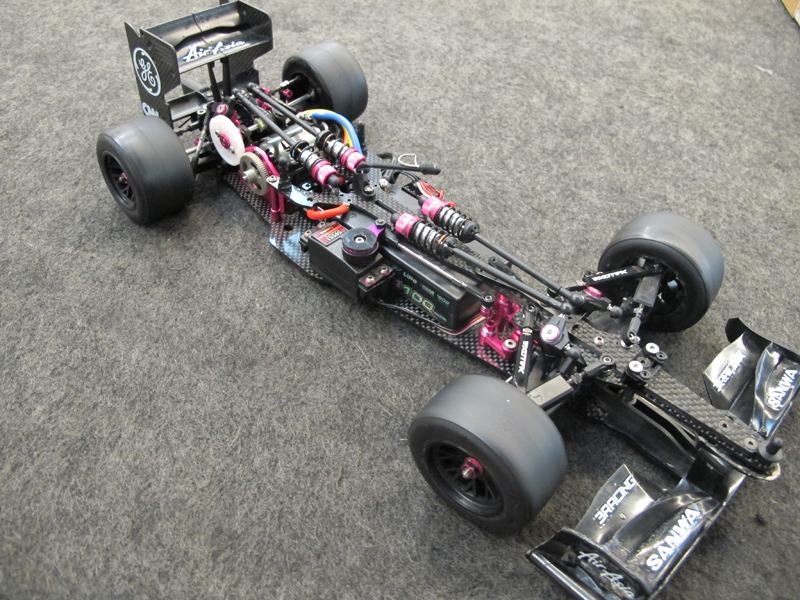
I am now in the possession of the new SpeedPassion car, the SP-1. Like most of the new cars out there it is a link style car. The front end is a little different than most, using an upper pivot ball similar to a 1/12 car like the CRC line. It also utilizes a steering rack as well, instead of the traditional direct steering set up.
The build up is a little different than most to get an 190mm legal car with Pit Shimizu tires, so we'll dive in with some photos.
I decided to add another hole for the links in between the two available. I have noticed some of the cars out there have some angle to the links. I had Howard Lo of Speed Passion do this to his car and I wanted to be able to try different settings as well. I drove Howard's car before I built this and I felt like it had a lot of rear grip compared to the typical straight link. The photo shows a line scribed in the CF with the point of my calipers. I used the calipers to find the difference of the holes on center, and then I scribed the line by centering the point of the calipers on the edge of the existing holes. I did the same with the pod plate.
Once drilled I finished the holes with a dremel stone bit that happens to be just about perfect as a countersink.
Now I can select multiple angles for the links to get the amount of "link toe" that I want. The link toe seems to help the car be more planted. UF1 MIDWEST inaugural champion Rick Vessel says this is due to controlling the roll steer inherent in link cars. Remember that changing the link positions will probably require resetting the "football" pivot.
Note difference in angle in the links !! Also Tamiya F104V2/RM01 links fit perfectly if you need them in a pinch, or if you want to try their hard carbon version.
While we're at it, you may also want to address the 3mm nuts used on the football pivot. I am a Dremelin' fool, so I knocked the flanges off 2 serrated 3mm nuts and used those to secure the pivot without rounding out the plastic on the pivot. Another suggestion is to use a 3mm tap on the nyloc nuts that come with the car so they will hold your setting but not round out the pivot when you need to make adjustments.
Another nice adjustment is the ability to move the shock forward and back on the top deck. There are 3 holes, though one seems to be designated for the antenna tube. I don't use an antenna tube, so it's open for shock attachment. Moving the shock forward will put more weight on the nose end of the car for more steering. I did have to use a Tamiya long shock end to reach the longest setting however
As far as the front end, you should look at
Howard Lo's RCTECH post on the 190mm front end modification. It has all the changes you need to make to get the front end where it should be on Pit tires. Be aware that the screws should be through the INSIDE holes on the graphite plate, and the OUTSIDE holes on the aluminum cams on the arms!
There are a couple other things as well:
I drilled out the front half of the tension adjustment hole for the lower suspension ball. This allows a little finer adjustment on the tension by having one side of the arm free. The lower suspension ball is plastic and it is my one gripe with the car. I had to do some hand finishing and sanding to get the ball free in the arm, and I still was not really pleased with the result. A little teflon powder helped to free it up but the ball either needs to be metal or the plastic needs to be improved. An aluminum ball would be perfect here.
.Here you can see I dremeled a slot in the ball retainer to make it easier to thread in and adjust with a flat blade screwdriver.
In lieu of using shims under the steering knuckle, I used a 3mm screw as a droop screw for on the fly adjustment at the track. Note that you should set the length of the lower kingpins the same on both sides before setting the droop screws. The easiest way to do this is with a caliper measuring the length of the kingpin past the lower ball. Mine is at 5.5mm between ball and the lip of the kingpin.
That's most of the car. I'll elaborate on inital setup in my next post on performance. Please do note that the spur gear that comes with the car is actually really important. It has 18 balls, and I think helps contribute to a very smooth but slip free diff. The extra balls help with a good lock up without too much tension, which is huge on rubber tires.....